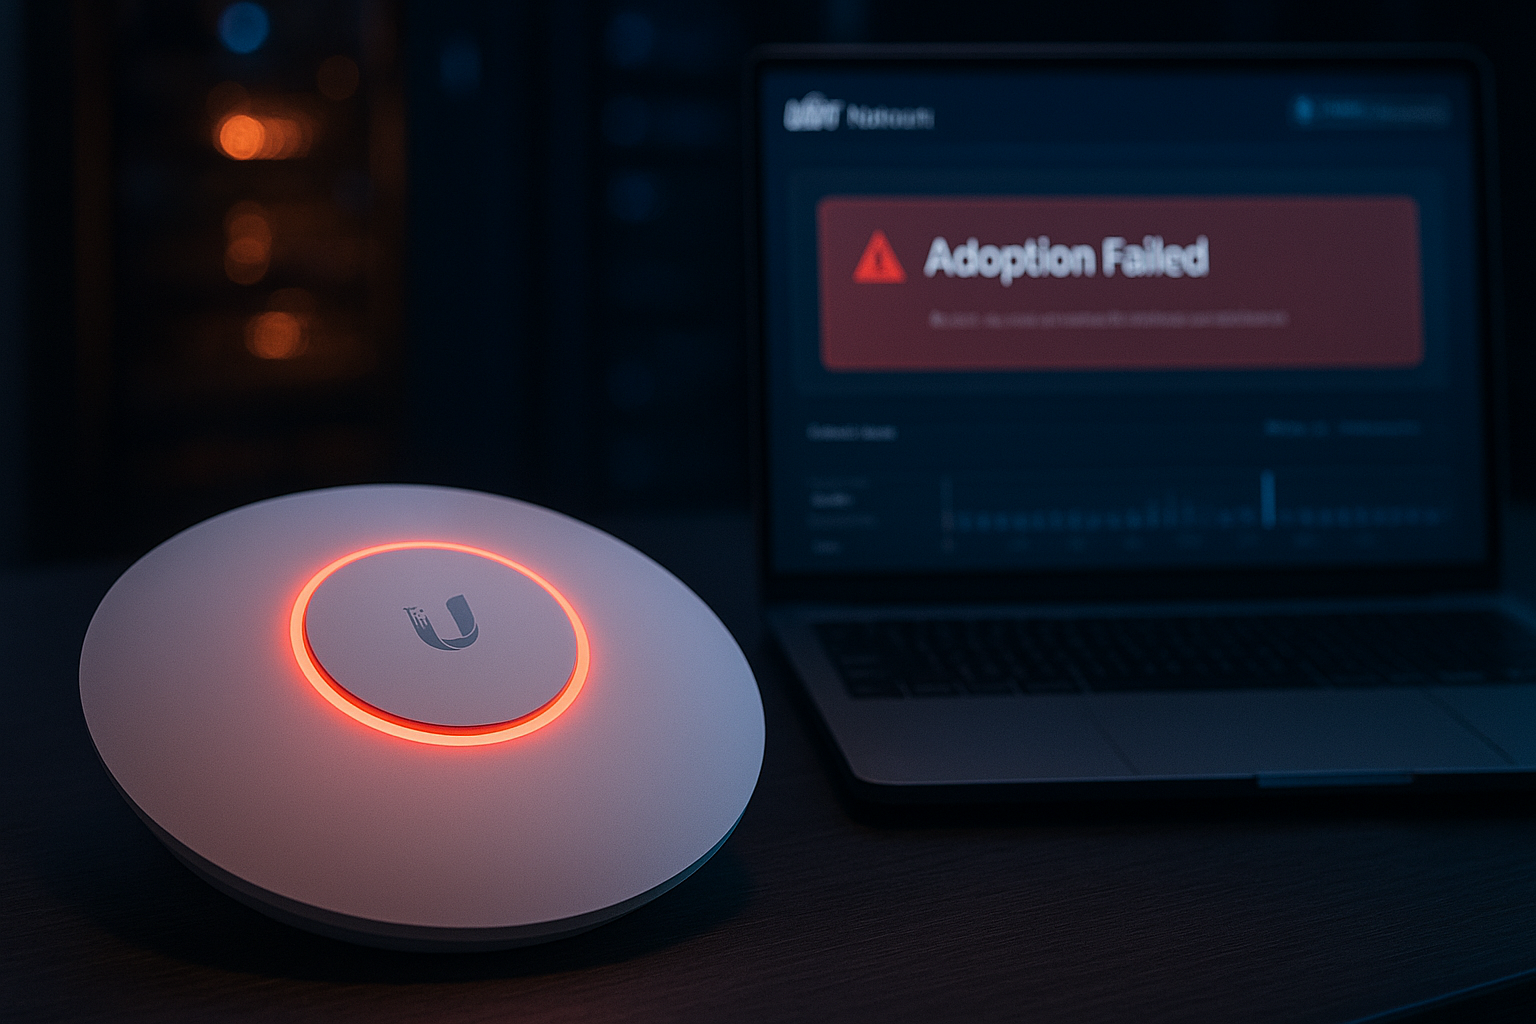
There are few things more frustrating for a network administrator than unboxing a shiny new Ubiquiti UniFi Access Point (AP), plugging it in, and watching it get stuck in the dreaded “Adoption Failed” loop. You see it go from “Adopting” to “Disconnected,” and finally to the red status of death: “Adoption Failed.”
Whether you are managing a simple home office setup with a Dream Machine Pro (UDM-Pro) or deploying an enterprise-grade network across multiple subnets, adoption issues are the most common hurdle in the UniFi ecosystem.
This guide will walk you through the proven steps to troubleshoot and fix UniFi AP adoption loops, ranging from basic firewall checks to advanced SSH command-line fixes.
Phase 1: The “Sanity Check” (Basic Diagnostics)
Before diving into the command line, we must rule out physical and basic configuration errors. In the US enterprise market, simple Layer 1 (physical) issues account for nearly 30% of adoption failures.
1. Check Your PoE Budget and Cabling
Ensure your switch provides the correct Power over Ethernet (PoE) standard.
- The Issue: Many newer APs (like the U6-Pro or U6-Enterprise) require PoE+ (802.3at). If you are using an older switch that only provides passive 24V PoE or standard 802.3af, the AP might boot up but fail to maintain a stable connection during the adoption process, causing a reboot loop.
- The Fix: Check the datasheet of your specific AP model and verify your switch’s PoE budget. Also, test with a certified Cat6 cable to rule out bad termination.
2. Firewall Ports (The Silent Killer)
If your UniFi Controller is hosted on a Windows Server, a Cloud Key, or a Docker container, firewalls often block the communication between the AP and the Controller.
- The Fix: Ensure the following ports are open on the device hosting the Controller:
- TCP 8080: Device Inform (Crucial for Adoption).
- UDP 10001: Device Discovery.
- UDP 3478: STUN (Session Traversal Utilities for NAT).
- TCP 8443: Controller GUI/API.
Pro Tip: If you are running the controller on Windows, check Windows Defender Firewall. It often blocks Java (which runs the UniFi Network Application) by default on public networks.
Phase 2: The “Set-Inform” Method (The SSH Fix)
If the basic checks pass but the AP is still stuck, this is the gold standard solution. This method forces the AP to communicate with the controller manually using Secure Shell (SSH).
Step 1: Find the AP’s IP Address
Use a network scanner (like Advanced IP Scanner) or check your router’s DHCP lease table to find the IP address assigned to the rogue Access Point.
Step 2: Access via SSH
Open your terminal (macOS/Linux) or PuTTY (Windows).
- Enter the AP’s IP address on Port 22.
- Login: The default credentials for a factory-reset device are:
- User:
ubnt - Password:
ubnt - (Note: If the device was previously adopted, use the SSH credentials found in your Controller’s System Settings).
- User:
Step 3: Issue the Command
Once logged in, you will see the Ubiquiti welcome screen. Type the following command to switch to the management client:
Bash
mca-cli
Next, issue the set-inform command pointing to your Controller’s IP address. Replace [Controller-IP] with your actual server IP:
Bash
set-inform http://192.168.1.10:8080/inform
(Replace 192.168.1.10 with the IP of your PC/Cloud Key/Server).
Step 4: Adopt and Repeat (Crucial Step!)
- Go back to your UniFi Network Controller web interface.
- You should now see the AP status change to “Pending Adoption” or “Click to Adopt.”
- Click Adopt.
- Wait! The AP will often disconnect again. This is where most people give up.
- Go back to your SSH/PuTTY window and issue the exact same
set-informcommand A SECOND TIME.
Bash
set-inform http://192.168.1.10:8080/inform
Why twice? The first command tells the AP where the controller is. The adoption process then provisions the AP, which may overwrite the config. Sending the command a second time “hardcodes” the path, completing the handshake.
Phase 3: The “Factory Reset” (The Fresh Start)
If the AP has incorrect residual configurations from a previous installation, SSH adoption will fail. You need to wipe it.
Method A: Physical Button
Press and hold the small Reset button on the back of the AP (near the Ethernet port) for 10-15 seconds using a paperclip until the LED lights turn off and start flashing.
Method B: Via SSH
If the AP is mounted on a high ceiling and you have SSH access, use this command:
Bash
syswrapper.sh restore-default
The AP will reboot to factory settings. Once it comes back online, repeat Phase 2.
Phase 4: Advanced L3 Adoption (DNS and DHCP)
For enterprise environments where the Controller is on a different VLAN or Subnet (Layer 3 Adoption), the AP cannot “see” the controller via broadcast. You must tell it where to go using DNS or DHCP.
Option 1: DNS Resolution
Configure your local DNS Server (Windows Server DNS or Pi-hole) to resolve the hostname unifi to the IP address of your controller.
- Record: A Record
- Host: unifi
- Target: [Controller IP Address]
Option 2: DHCP Option 43
If you use a MikroTik, Cisco, or Windows Server as your DHCP server, configure Option 43 to send the Controller’s IP address to the APs during the DHCP handshake.
Summary
Troubleshooting Ubiquiti adoption loops requires a systematic approach. Don’t panic; follow the OSI model layers.
- Physical: Check Cables and PoE budget.
- Network: Verify Firewall ports (8080) and IP conflicts.
- Software: Use the SSH
set-informmethod (twice!) for the most reliable fix.
By mastering these steps, you ensure a robust and stable Wi-Fi network infrastructure, minimizing downtime for your business or clients.
Disclaimer: This tutorial involves modifying network configurations and using command-line interfaces. Always backup your UniFi Controller configuration before making significant changes.